I love decorating for the holidays, any holiday actually. I have bins full of decorations that Paul pulls out for me whenever there is a holiday approaching. Decorating for the holidays also means craft time and if I am lucky, craft time with Em. I love searching on Pinterest and thinking about new crafts for us to make every holiday. It’s a great way to encourage creativity, building memories and traditions that will last and be passed down from generation to generation. One tradition for Easter that Em and I like to do is decorating Easter eggs. We have done them several different ways over the years from using shaving cream, food colouring, Kool-Aid, watercolour, wax and dyes to create beautiful colours and patterns. This year we decided to use purple cabbage and gold paint to create a robins egg blue colour with gold flex. The one thing I will say about using natural dyes like purple cabbage is I find that they take a lot longer to do then the ready to use dyes you get at the store. The pictures below are mostly of me doing each of the steps – Em lost interest when she realized that it was going to take more than 10 minutes for this craft but that’s ok because it is also a great craft to do on your own.
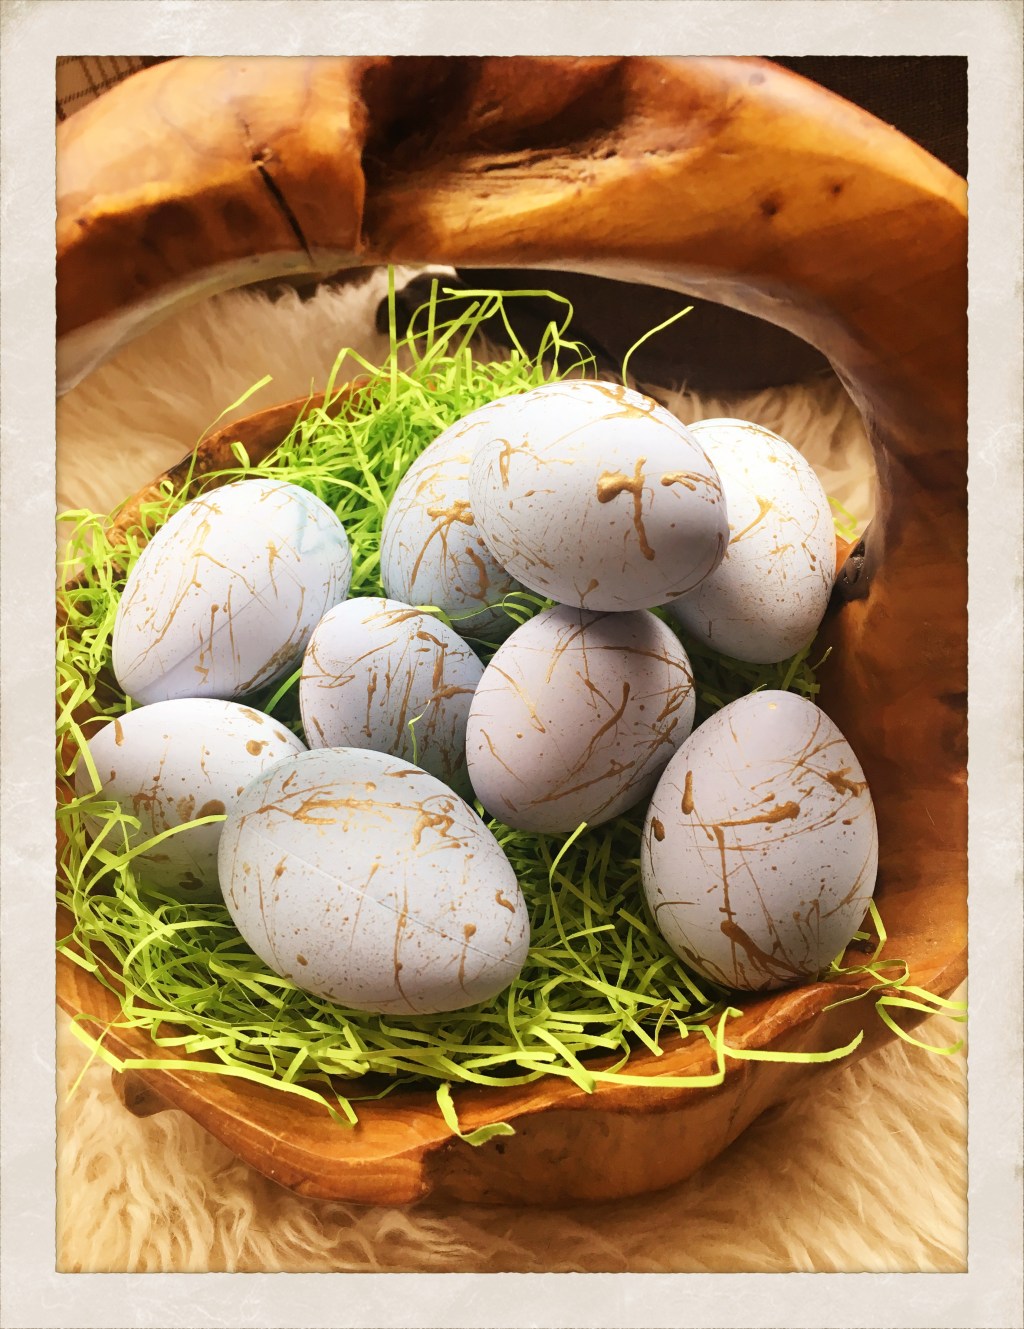
The Easter Eggs

I love the way these look, so pretty and so creative. A couple of things that we did different is that I we used hallow eggs bought from the dollar store and I didn’t leave the eggs in the dye for as long as you would want, to achieve the different shades of blue. Plus, traditional robins eggs are usually speckled where ours have more of a splattered artistic look to them.
Here is what you will need:
- 12 eggs (hard boiled, hollow or artificial
- 1 purple cabbage roughly chopped
- Gold acrylic paint
- Paint brush with stiffer bristles hairs
- 6 cups of water
- 5 tbs of white vinegar
- A large Pot
Here is how to make the Easter Eggs:
![IMG_E2409[1]](https://athomeca.com/wp-content/uploads/2018/03/img_e24091.jpg?w=3953&h=3021)
- Roughly chop the cabbage ( I only used half of the cabbage)
- Add the cabbage and water to the pot and bring to a boil.
- Once the cabbage and water is boiling, reduce the heat and simmer for approximately 30 minutes and then let cool.

- Once the cabbage is cooled, removed the cabbage from the pot.
- Add 5 tbs of white vinegar and stir.

- Add the eggs to the water and cover with the dye. If you are using artificial or hollow eggs be sure to stir them gentle and frequently because they will not sink to the bottom like hard boiled eggs will.
- Keep eggs in dye for a minimum of 1 hour up to overnight. The longer you leave the eggs in the dye the darker they will become.

- Remove the eggs and place on a paper towel until dried. I like to used an empty egg carton to stand the eggs to dry.

- Once the eggs are dry, tip the end of the paint brush in the gold paint and flick the bristles to create the desired pattern on your eggs.
- Let eggs dry on a paper towel.
I hope this craft inspires you to be creative in your home – enjoy!


Leave a comment